Home Fruit Production – T-Budding Citrus
Julian W. Sauls, Ph.D.
Professor and Extension Horticulturist, retired
Texas A&M Agrilife Extension Service
August 1, 2001
In this presentation on citrus T-budding, 29 images are included to illustrate the finer points of the technique. Each image is shown with the text as a thumbnail version for speed of downloading–simply click on the thumbnail image to see it as a full-screen version. When finished viewing the full-screen image, click “Back” to return to the text and thumbnails.
While it is called T-budding, the process being described is technically an inverted-T. This same procedure is also used to bud a number of woody plants, including all citrus types, peaches, nectarines, plums, apples, grapes, roses and others. T-budding can be done anytime the bark of the rootstock is “slipping”, i.e., the bark separates easily from the underlying wood. For citrus in subtropical areas, the bark slips from early spring through late fall. In greenhouse production and in tropical areas, the bark slips anytime the plant is in active growth–which is practically year-round.
In many commercial citrus-growing areas of the U.S. and the world, budwood is collected only from sources that are certified to be free of a number of viral diseases. Quarantines exist to prevent the movement of citrus propagation materials from one region, state or country to another so as to preclude the spread of citrus diseases to other citrus areas. To obtain budwood from any other citrus area is illegal under either state or federal law or both.
Materials
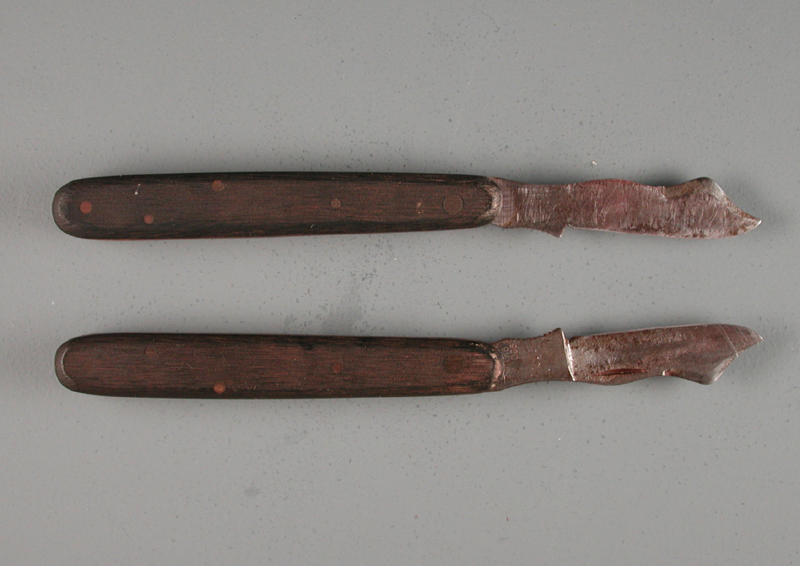
Budding knives are extremely thin-bladed, with both right-handed and left-handed versions. Image 1 shows opposite sides of a typical right-handed budding knife–the side of the blade shown on the upper knife is flat (unground) while the opposite side (the lower knife) is ground down to the cutting edge. Many budders prefer high carbon steel blades (rather than stainless steel) because they are more easily kept sharpened to a razor edge.
The best of pocket knives are usually too thick-bladed to use for budding. Utility knives with replaceable razor blades may be the better choice. Blade thinness and sharpness are critical for successful budding, as a thick or dull blade causes jagged cuts which do not “take” readily.
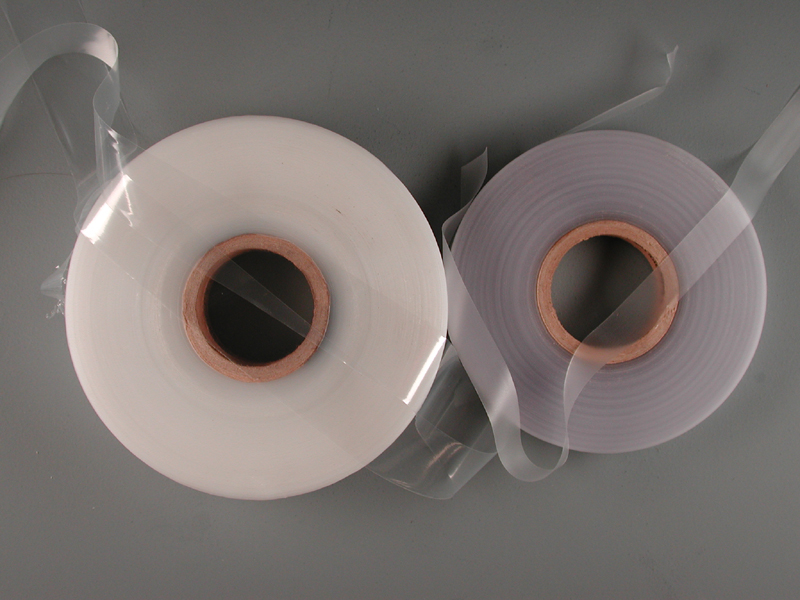
Most budding tape is either clear, very thin polyethylene (at left in Image 2) or somewhat thicker, opaque polypropylene. For home use, strips can be cut from plastic sandwich bags. Neither electrical nor “Scotch”-type tapes are recommended, though plumber’s teflon tape should work. The purpose of the tape is to exert a little pressure on the inserted bud, to keep out excess moisture and to protect the bud while the cut surfaces heal and begin to grow together.
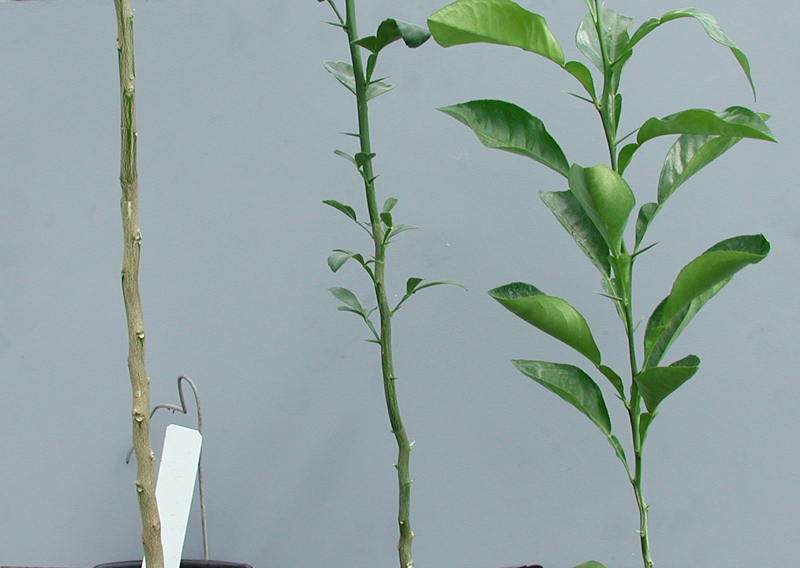
Seedling rootstocks of at least pencil diameter are usually the easiest for beginners, although both smaller and much larger stocks can be budded successfully. Image 3 shows three seedlings, all of which are buddable. The seedling on the left was used for most of the subsequent images of the actual budding process.
Budwood for home use may be collected from any tree of the desired variety–in most cases from friends, relatives, neighbors or local nurseries. Each of the major citrus-producing states have budwood certification programs which sell virus-free budwood to residents. Because citrus trees typically have four or more growth flushes annually, there should always be usable budwood.
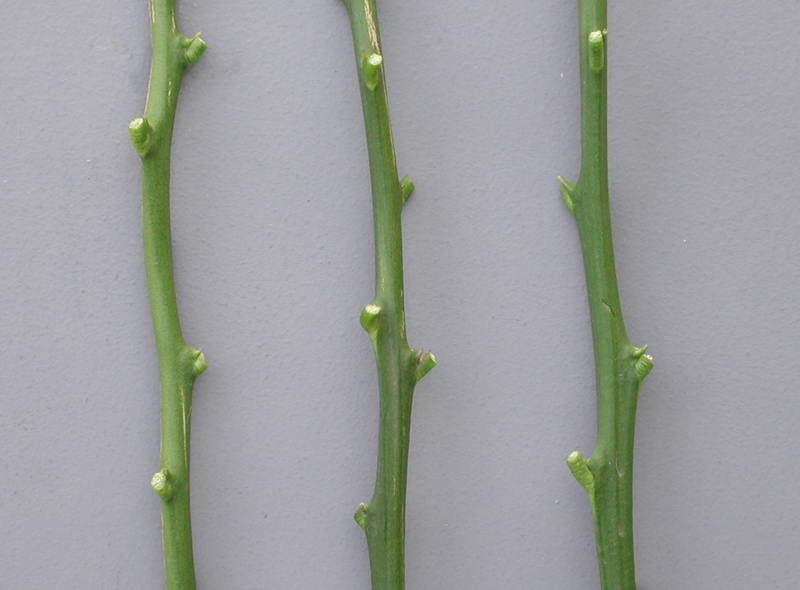
In the image at right, the budstick at left is the best, the middle one can be used with good technique, but the one at right is too angular. Each of these three budsticks represent a different growth flush of the same branch–the one on the left having developed in the early spring, the middle one in late spring and the one at right in mid-summer. If you look closely at the second bud up from the bottom on each budstick, you will see that the bud and surrounding twig on the leftmost budstick is round and plump while that of the rightmost is angular and skinny. If left on the tree, the budstick at right would have looked like the one in the middle after the next growth flush and then like the one on the left after the second growth flush.
Budwood should be placed in closeable plastic bags and kept cool until use. For storage longer than a couple of hours, the bag should be placed in the refrigerator. Under such conditions, citrus budwood can be stored for several weeks, if absolutely necessary.
Preparing the stock
Unless local conditions warrant budding very high on the rootstock, about six inches above ground should be adequate. In the area to be budded, carefully clip off all leaves, thorns and side twigs. For optimal success, the area where the bud is to be inserted should be fairly straight with about an inch or so between two remaining leaf bases. This distinction will become clear as you look at the next five images.
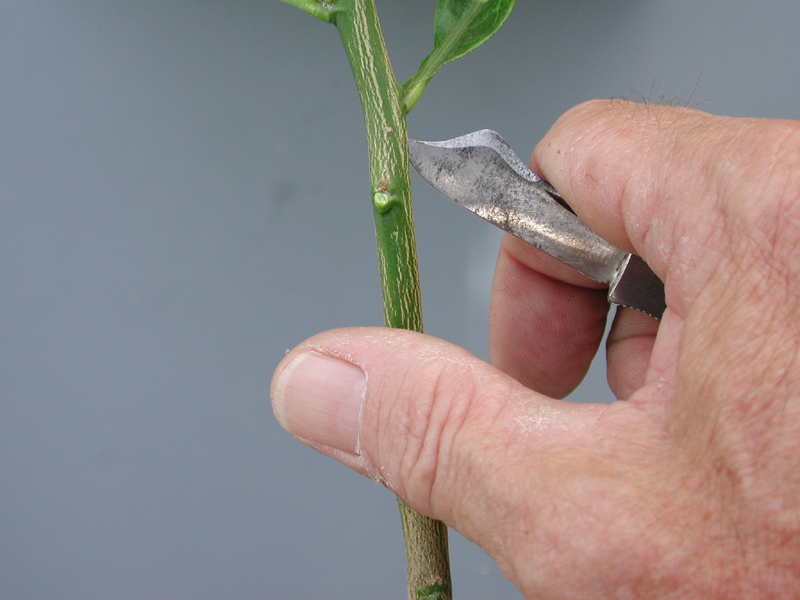
Image 5 is a side view showing the relatively shallow depth of the point of the budding knife as it starts to make the vertical part of the T-incision. The bark is quite thin and very soft, so a sharp knife easily penetrates and cuts the bark with very little pressure. There is no reason to cut into the wood–with practice, you can “feel” the knife tip as it penetrates the bark and makes contact with the wood.
Images 6, 7 and 8 show the progression of the horizontal cut at the bottom of the vertical one. Note that the cutting edge of the blade is angled upward sharply, probably at about 45 degrees. To start the cut, place the blade edge at the left side of the vertical cut as shown in Image 6, press it firmly but lightly into the bark (again, with practice, you can “feel” when the blade penetrates the bark). Maintaining the same light pressure and angle of the blade, “walk” the blade across the stock (do not use a sawing motion!).
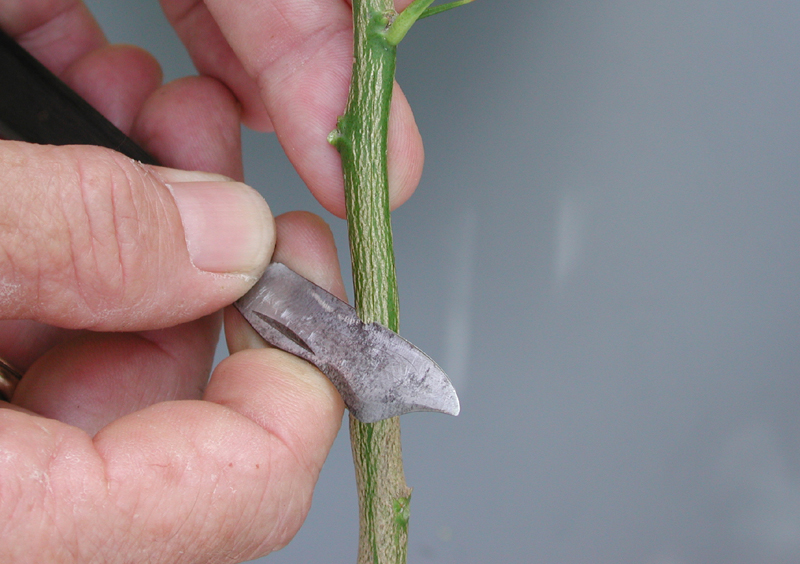
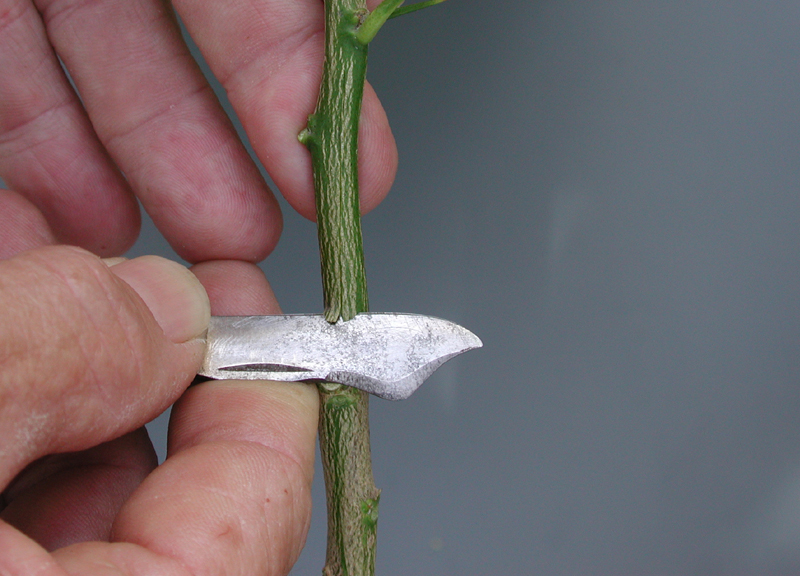
Note the position of the thumb and forefinger in each image, since their position shifts to the right as the cut is completed. In Image 6, the wrist is cocked or bent backward, it is nearly straight in Image 7 and it is slightly curled inward in Image 8–solely by moving the wrist and forearm slightly to the right from beginning to end of the cut. Also, note how the knife edge lifts up the bark during this cut–that is why the blade edge is angled sharply upward. As you examine the completed incision in Image 9, notice that the bark flaps at the bottom of the inverted T are still raised from the stock. These raised flaps provide a guide for easier insertion of the bud.
Cutting the bud
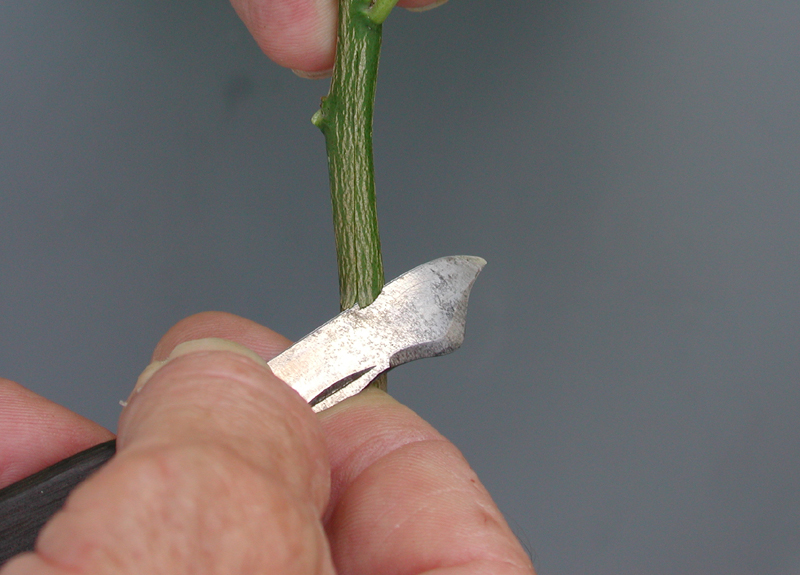
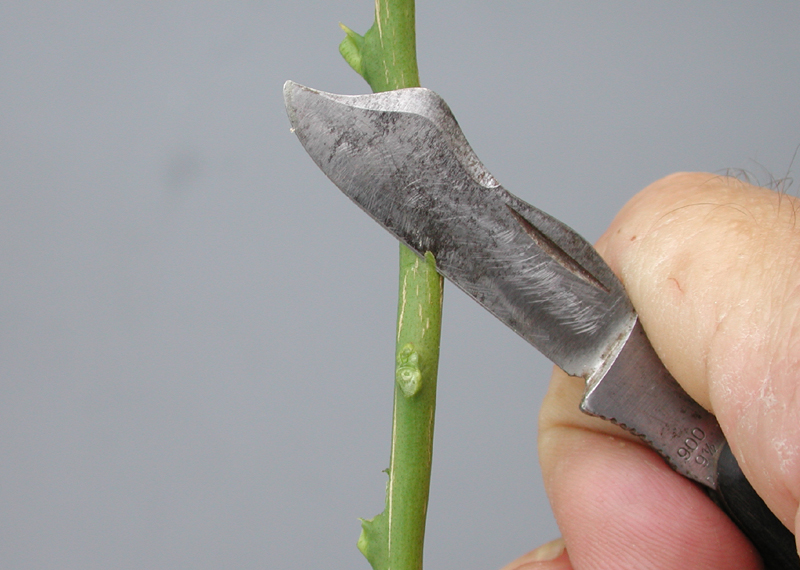
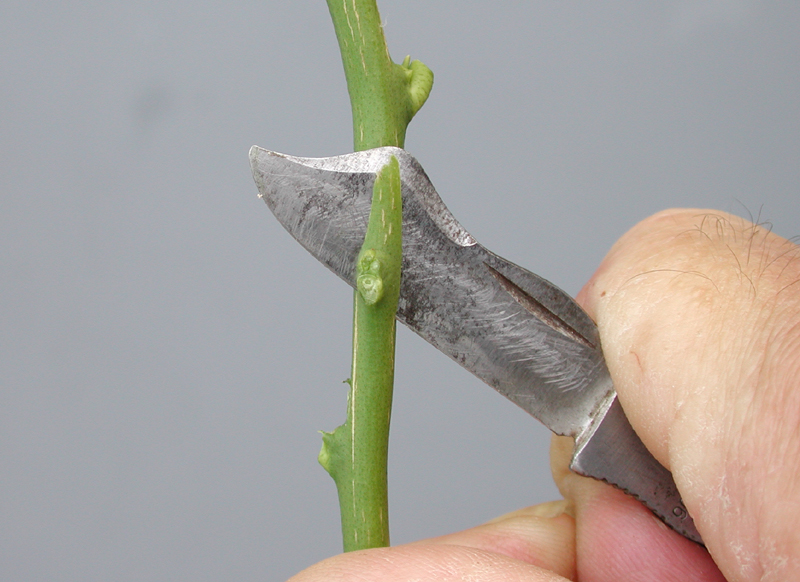
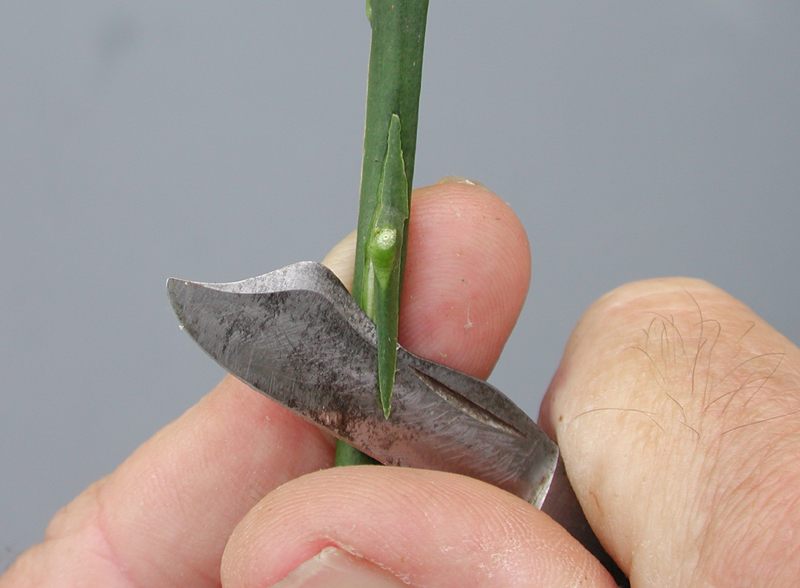
The most critical aspect of budding is cutting the bud itself–it is only a very thin slice of bark and a sliver of wood beneath the bud, but it must be cut evenly and smoothly. The flat side of the blade must be flat against the budstick (Image10), with the knife held at about a 45 degree angle to the budstick (Image 11). With the thumb braced along the stick below the bud, simply draw the knife towards the thumb (again, no sawing or rocking motion!), keeping the blade flat against the stick to prevent it from cutting too deeply (Image 12). If the blade remains flat against the stick, it will normally slice under the bud and exit below it (Image 13).

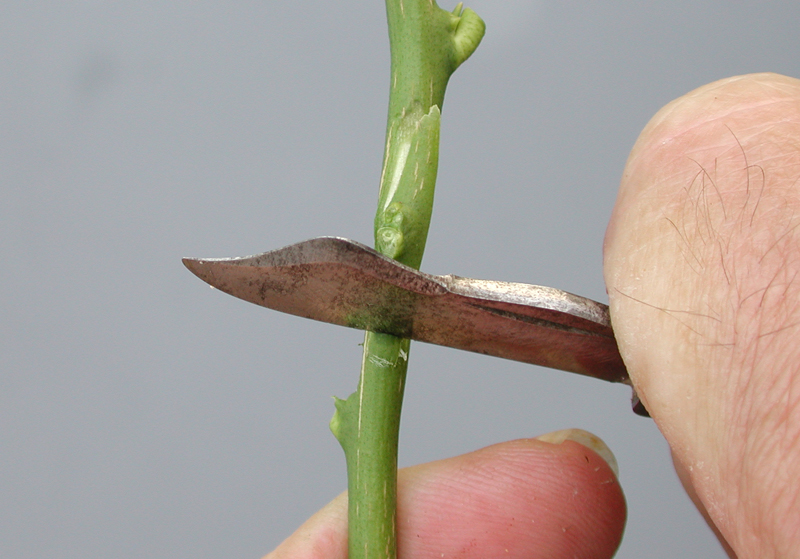
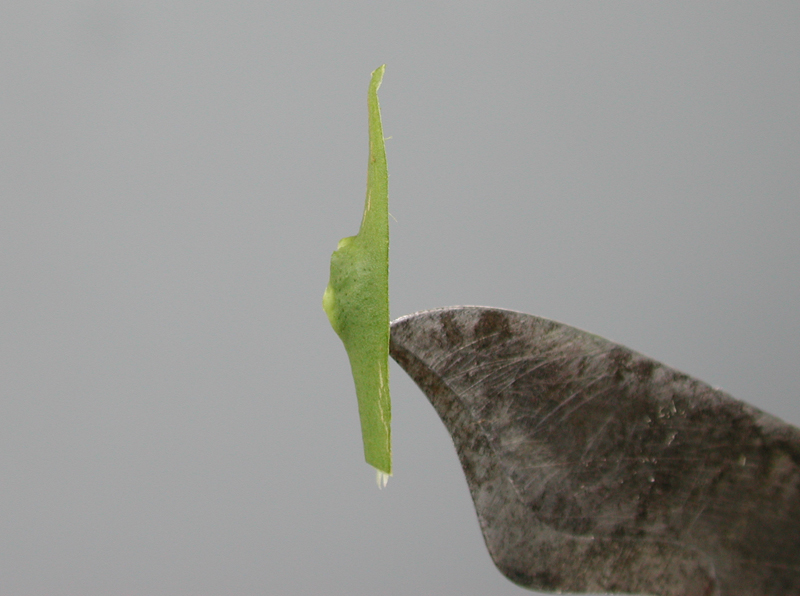
Sometimes, the budwood won’t cooperate or the knife cuts too deeply into the wood to exit. If the cut is a smooth one, simply back the knife out and cut off the bud piece about half an inch below the bud, with the blade edge angled downward as shown in Image 14. Examine the excised bud piece in Image 15. It is less than an inch long, with the bud itself near the middle. Obviously, it is just a very thin slice of the budstick. More importantly, the cut surface as seen in this side view is smooth and very straight–this bud will “take”!
Inserting the bud
Place the upper end of the bud piece beneath the bark flaps at the bottom of the inverted T and gently but firmly push it upward with your thumb (Image 16). With a good stock and slipping bark, the bud will easily slide under the bark, lifting it from the wood as the bud is pushed upward. Slide it upward until the entire bud piece is beneath the bark of the stock (Image 17). Note that the sides of the bud piece are completely beneath the bark on both sides of the vertical part of the T, with the actual bud about centered between the two cut edges of bark. A side view of the inserted bud (Image 18) shows
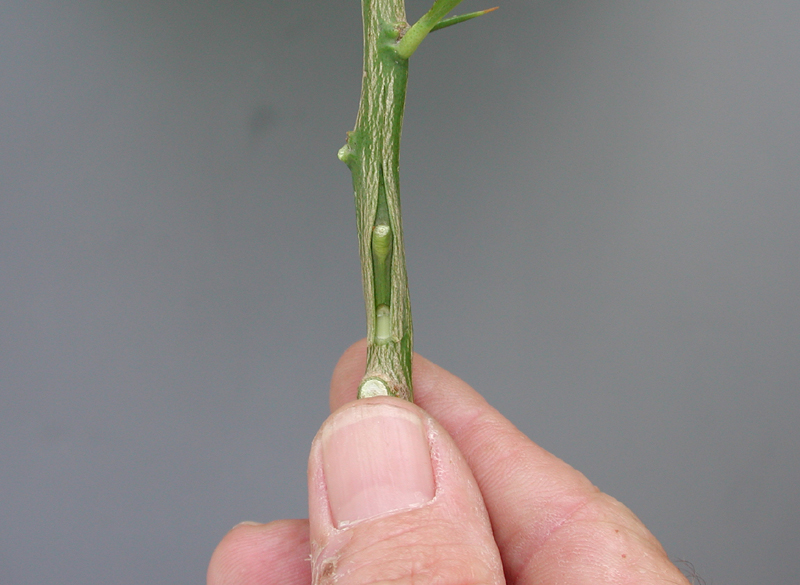
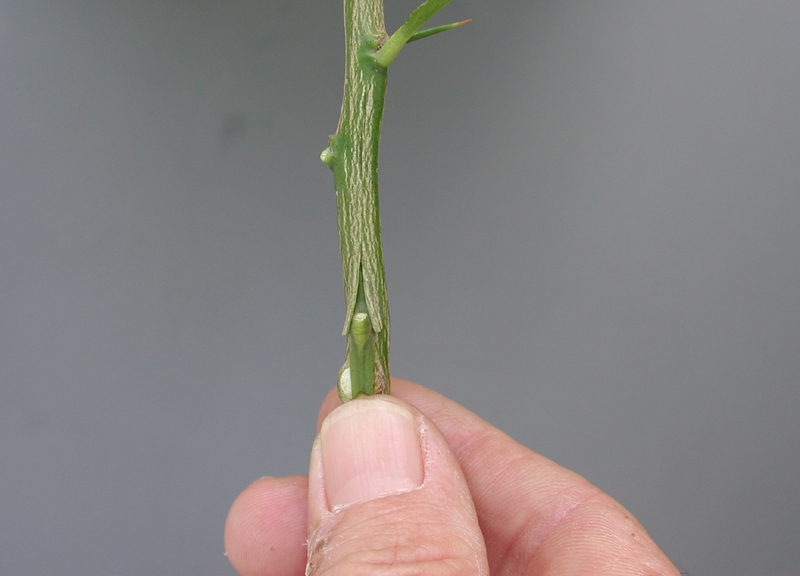
mostly the bark of the stock, with the bud, its attendant thorn, the leaf base and a little of the bark of the bud piece.
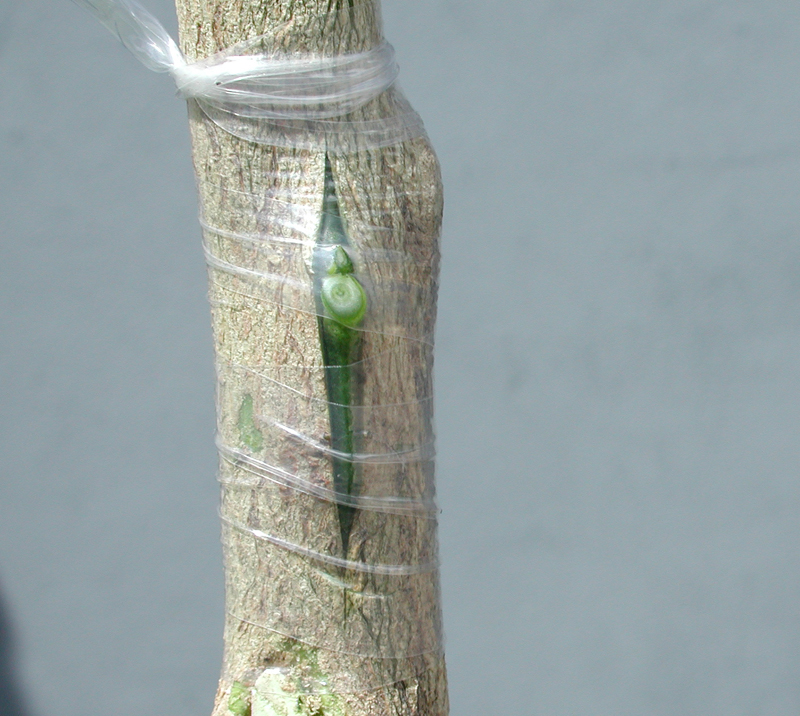
Start wrapping the bud below the incision, making several turns around the stock until the entire bud and incision are covered, finishing with the end of the tape tucked beneath the last turn (Image 19). During wrapping, maintain firm pressure on the tape, but don’t stretch it so hard that it breaks. If the tape breaks, remove it and start over with a new strip, using a little less pull.
Beginners will often put two or even three buds on a stock in hopes of increasing the odds of success. Since good technique has better than 98 percent success, multiple buds will not overcome poor technique. It would be more useful to practice slicing buds from a budstick until you can consistently cut them like the one in Image 15. Even then, save the unused budsticks until after unwrapping–just in case you need to rebud.
Forcing and Aftercare
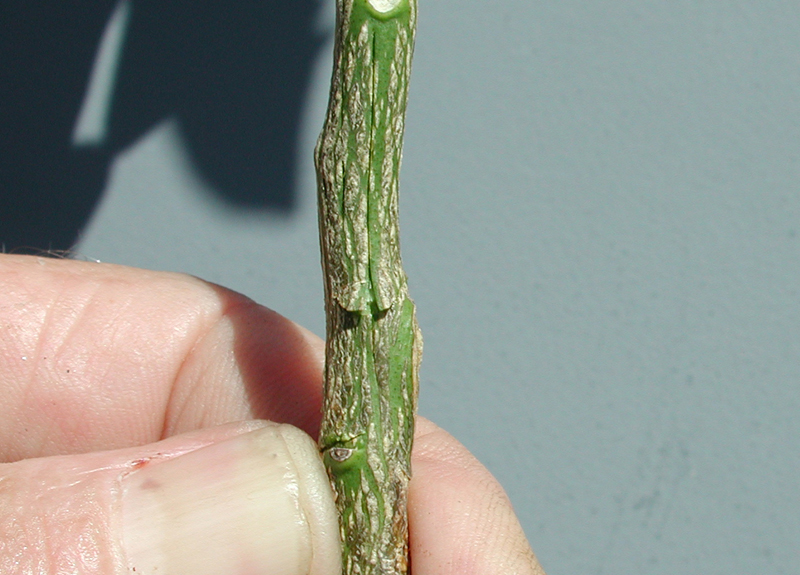
After 12 to 14 days, healing and union should have occurred, so remove the tape. The easiest removal is to simply make a vertical cut through it on the backside of the stock away from the bud, then slip it off. You can also cut it at the tuck and unwind it.

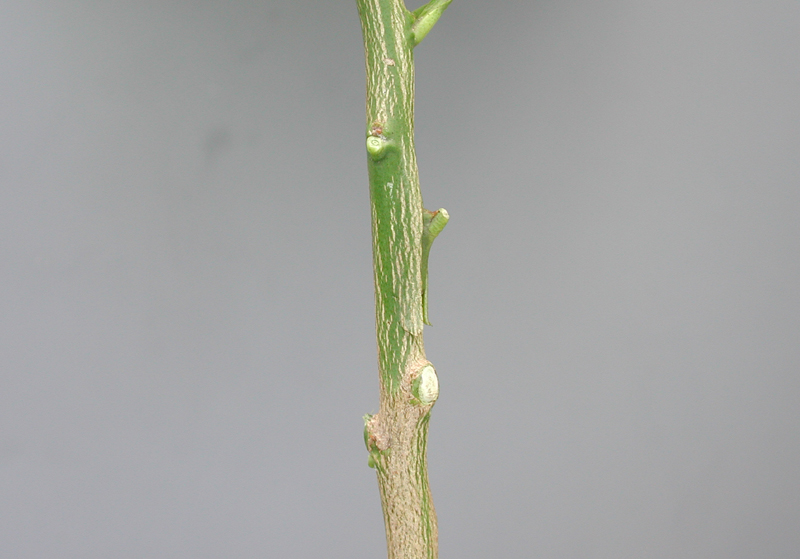
If your technique was somewhat lacking or if this is just one of those one or two percent that simply don’t take, the bud will be mostly brown or blackish (Image 20), and may just look rotted. In this case, select another spot on the stock and rebud it. A live bud will still be as green (Image 21) as it was when you inserted it two weeks earlier. The small stub of the cutoff leaf petiole will have turned yellow and it will readily fall off, if it didn’t come off during unwrapping.
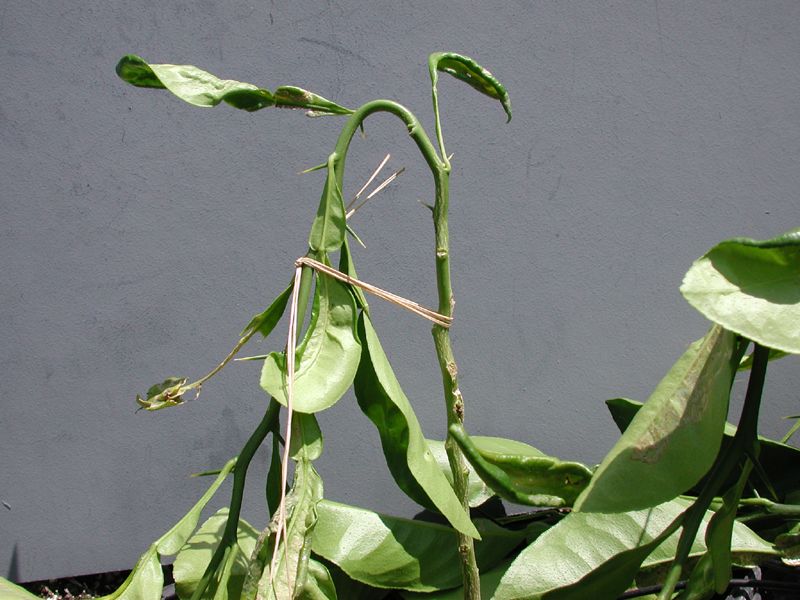
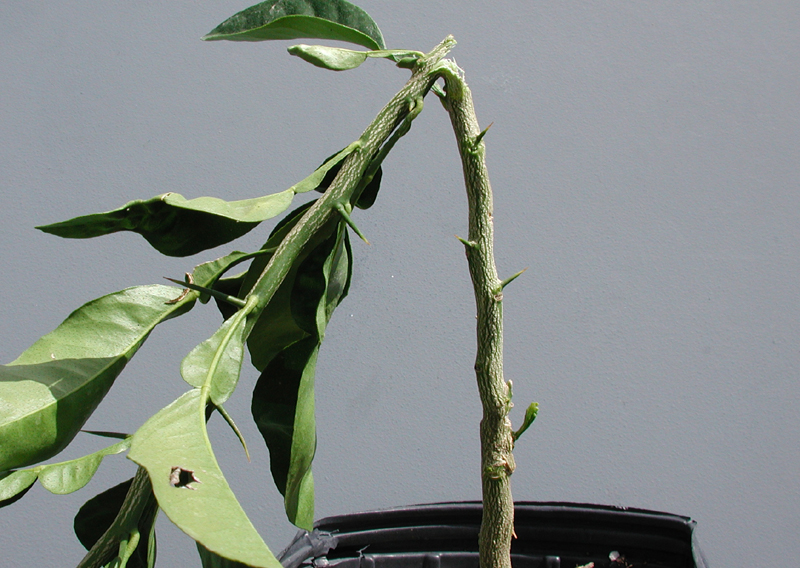
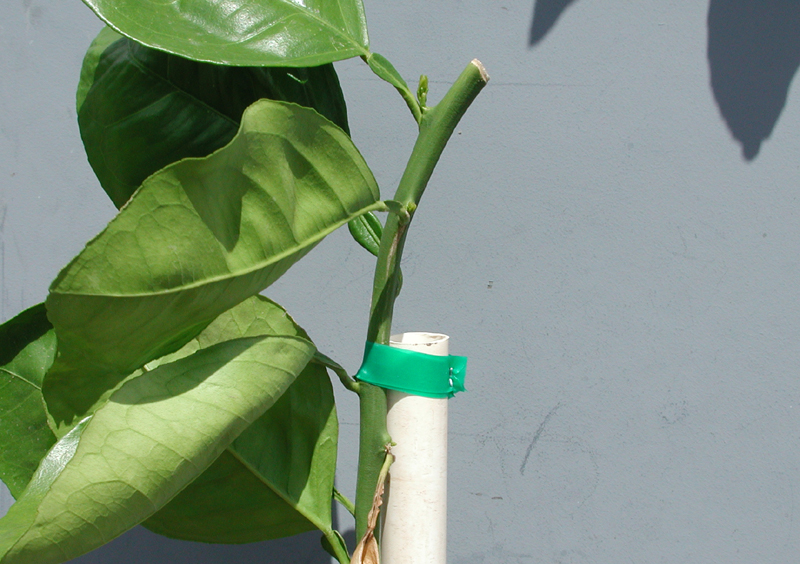
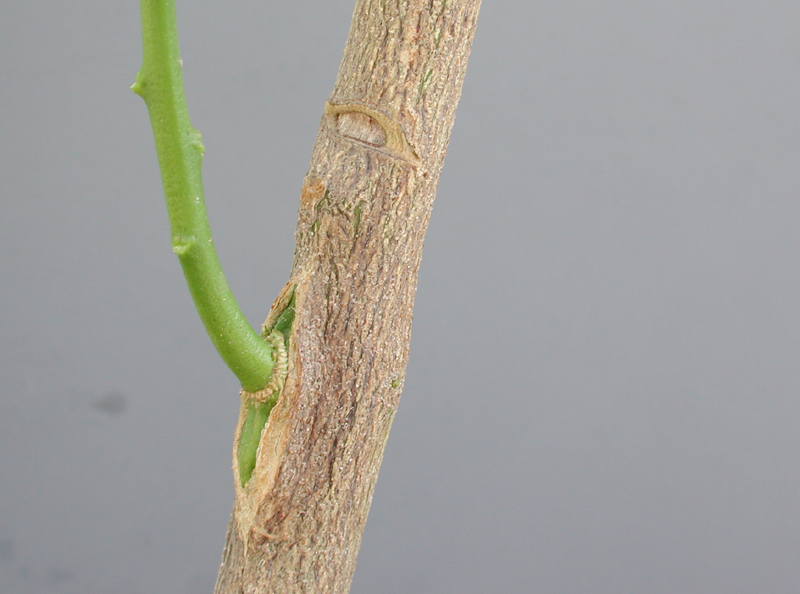
Now that you have a live bud, there are several ways to “force” it to grow. For the limber stocks suggested herein, just bend the top of the rootstock completely over and tie it to itself (Bending–Image 22). If the stock is a little too large to bend readily, cut partway through it at a point several inches above the bud and break it over at that cut (Lopping–Image 23). For really large stocks, cut out a notch of bark on the stock above the bud (Notching-Image 24). Notching does not force buds as readily as bending or lopping.
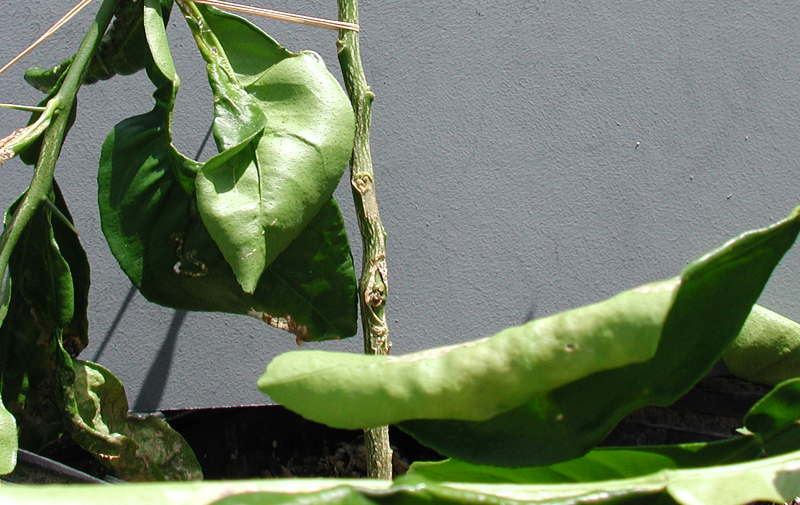
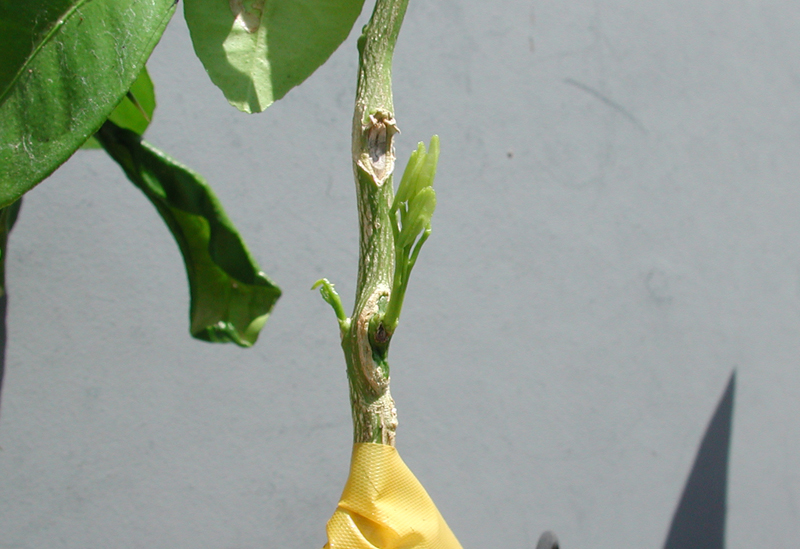
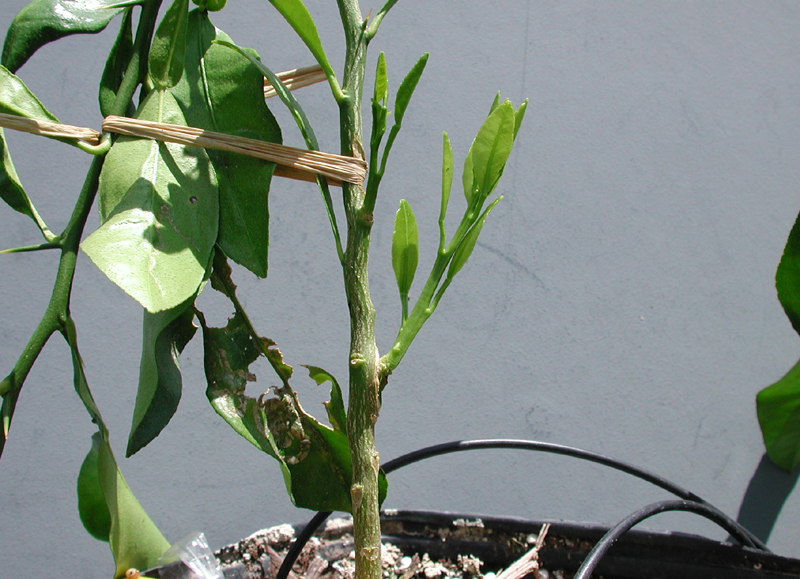
Within a week or so, the bud will begin to grow (Image 25), as will previously dormant buds on the stock–note the just-broken rootstock bud to the left of the new budling. Because you want to direct all of the rootstock’s energy into the new budling (Image 26), all other sprouts should be broken off as soon as they appear. Be very careful that you don’t accidentally break off the budling, as it is very brittle and easily snapped off at this stage. Disbudding will cease to be necessary in a month or so, as the growth of the budling will suppress other buds on the stock.
When the budling reaches several inches in length and its stem hardens, it should be loosely tied to the rootstock top. When it grows above the bend (or break) of the rootstock, a bamboo, PVC pipe, wooden or other type of stake should be inserted alongside the plant. The stake should extend at least six inches into the soil and about two feet above the soil. As the budling grows, continue to tie it loosely to the stake.
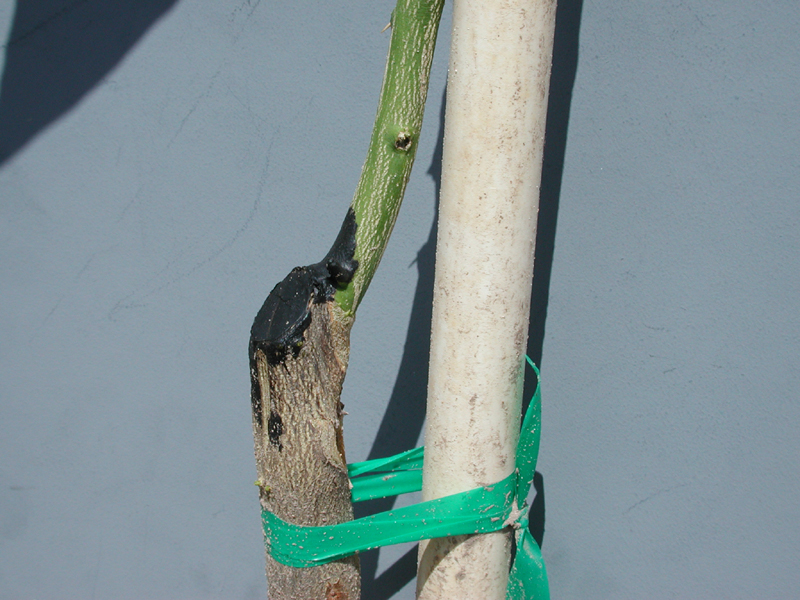
When the budling surpasses the top of the stake, cut off the rootstock top at a slight downward angle opposite the base of the budling and as close to it as possible (Image 27). Because the budling must be “headed”, cut it off just above the top of the stake (Image 28) to force several buds at the top to grow to form the primary scaffold limbs of the new tree.
The headed, finished tree (Image 29) is ready to plant. The entire process from budding to finished tree requires about nine months, give or take a couple of months depending on season, climate and care of the growing budling.